The best way to remove background sound from video is with software. You can use the built-in features of a video editor like DaVinci Resolve or jump into a dedicated audio program like Audacity. The basic idea is to find a sample of the unwanted noise and then use a filter or an AI tool to subtract it from your main audio track, leaving your voice clean and clear.
Why Clear Audio Is Your Most Important Asset
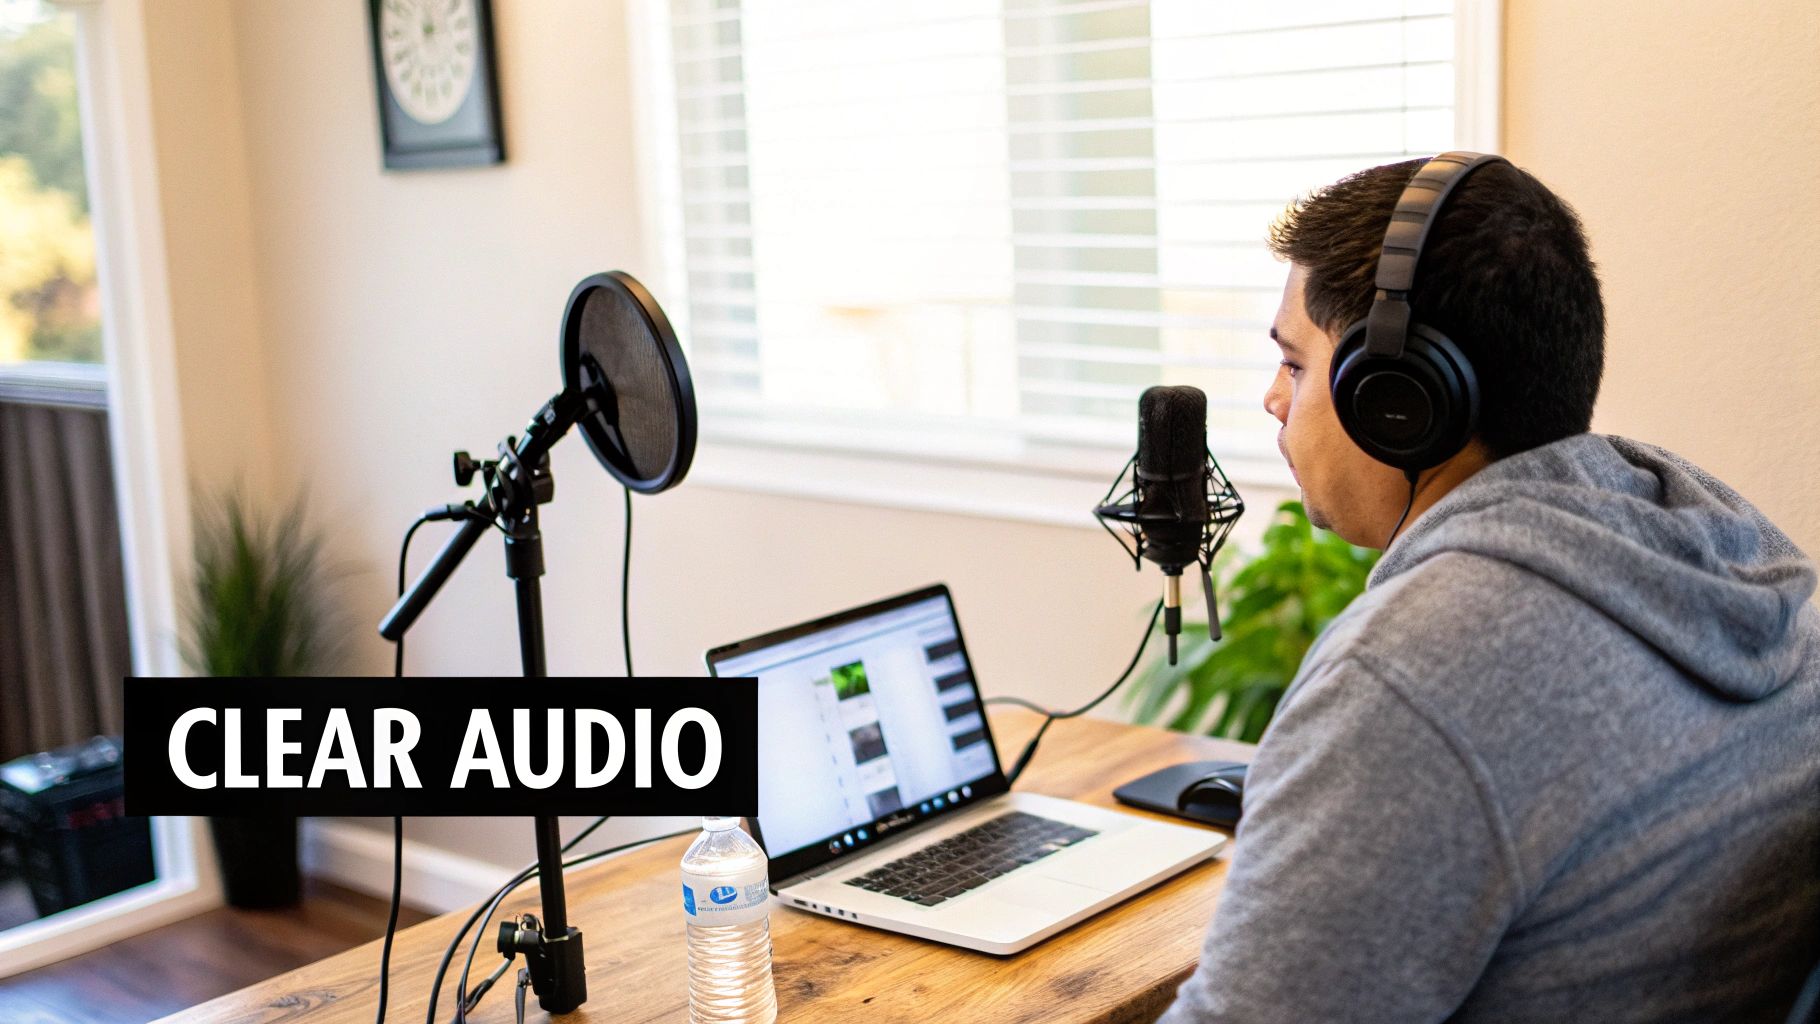
Let's cut right to the chase: bad audio is a dealbreaker. You can shoot in stunning 4K with a killer script, but if your sound is full of hum, hiss, or background noise, viewers are gone. It’s not just annoying; poor audio actively sabotages the trust and authority you're working so hard to build.
Put yourself in your audience's shoes. When they hear a constant air conditioner hum, a distant dog bark, or the rumble of traffic, their brain has to work overtime just to follow what you're saying. That little bit of extra effort is often all it takes for them to lose focus and click on the next video.
On the flip side, clean audio makes the entire experience effortless and immersive.
The True Cost of Distracting Noise
The damage from bad audio goes deeper than just being a minor irritation. It hits the metrics that platforms like YouTube use to judge your content's success. All that distracting background noise can lead directly to:
-
Shorter Watch Time: When people get annoyed by noise, they leave. This tells the algorithm your video isn't holding their attention.
-
Lower Perceived Quality: Even if they can't put their finger on it, viewers associate clean audio with professionalism. Muffled or hissy sound just feels amateur.
-
A Weaker Message: If your voice is fighting to be heard over other sounds, your message loses its punch and becomes harder for people to remember.
The bottom line is this: audio isn't just a technical setting. It's the very foundation of how you communicate. Clean sound makes your message land with more authority, builds your credibility, and keeps your audience engaged from the first second to the last.
Your Path to Professional Sound
Thankfully, you don't need a Hollywood budget to get professional-sounding audio anymore. The tools we have to remove background sound from video have come a long way, thanks mostly to smart AI and machine learning.
The demand for great audio is huge, especially with the live streaming industry expected to hit USD 184.3 billion by 2027. A recent study even found that 83% of live streaming pros say audio quality is the most critical part of the viewer experience. You can dig into some of the market trends shaping content creation if you want to see the data for yourself.
This guide is here to walk you through it all. We'll start with things you can do before you even hit record to capture cleaner audio from the get-go. Then, we’ll get into the nitty-gritty, step-by-step workflows in popular software to help you turn noisy recordings into polished, professional audio.
Preventing Bad Audio Before You Hit Record
Honestly, the best way to remove background sound from video has nothing to do with software. It's all about what you do before you even press the record button.
I’ve seen creators spend hours battling aggressive noise reduction filters in their editing software, all to fix a problem that could have been avoided with five minutes of prep work. Think of this as your pre-flight checklist for getting clean, professional-sounding audio right from the start.
It all begins with just… listening. Before you touch your camera, close your eyes and pay attention to your recording space. What do you really hear? That low hum you’ve learned to ignore for years is your refrigerator, and trust me, it will be painfully obvious in your recording.
Every sound you can kill now is a headache you won't have to deal with later. The goal isn't to build a million-dollar studio; it's about making your current space as quiet as possible.
Taming Your Recording Environment
The room you record in is the single biggest variable in your audio quality. If your space has lots of hard surfaces—wood floors, big windows, bare walls—you're going to get a ton of echo and reverb. That makes your voice sound distant and amateurish. On the flip side, a room with soft surfaces will naturally absorb sound, giving you a much cleaner track to work with.
Here are a few practical, zero-cost ways to get your space under control:
-
Silence the Appliances: Unplug that mini-fridge. Kill the HVAC or air conditioner while you're recording. Shut down any other computers in the room with whirring fans.
-
Secure the Perimeter: Close all the doors and windows. This helps block out street traffic, barking dogs, and everything else happening outside. A simple sign on the door can also work wonders to prevent interruptions.
-
Embrace Soft Surfaces: You don't need to buy expensive acoustic panels. Try recording in a room with a carpet, thick curtains, or even a bookshelf packed with books. I've found that just throwing a heavy blanket over a nearby chair can dramatically cut down on sound reflections.
I once recorded an entire online course in my walk-in closet. Surrounded by clothes, the audio was incredibly clean and dead—absolutely no echo. It’s proof that you can get professional results without a professional studio.
Your microphone is not as smart as your brain. It cannot selectively ignore background noise. It hears and records everything equally, which is why eliminating sounds at the source is always the most effective strategy.
Choosing the Right Microphone Matters
Not all mics are created equal, and picking the right one for your room can make a world of difference. The two main types you'll run into are condenser and dynamic microphones, and they behave in completely different ways.
Condenser Microphones are extremely sensitive. They’re fantastic for capturing every subtle detail of your voice in a quiet, acoustically treated studio. But in a typical spare bedroom? They will pick up everything—the air conditioner kicking on, your chair creaking, the cat walking down the hall. That popular USB mic on your desk is probably a condenser, which is why it captures your keyboard clicks so perfectly.
Dynamic Microphones, however, are much less sensitive and are built to reject sound that isn't coming from directly in front of them. This makes them a much better choice for most creators working in imperfect spaces. They focus on your voice and ignore a lot of the ambient room noise.
A good way to think about it: a condenser mic is like a floodlight, illuminating the entire room's sound, while a dynamic mic is a spotlight, focused only on you.
Mic Technique Is Your Secret Weapon
Finally, how you use your microphone is just as important as which one you buy. The single most effective tip I can give you is this: get the mic as close to your mouth as you comfortably can, usually around 4-6 inches away.
This technique takes advantage of something called the proximity effect, and it delivers two massive benefits:
-
It makes your voice significantly louder compared to any background noise.
-
It allows you to turn down the microphone's gain (its sensitivity), which means it will pick up even less of the room's ambient sound.
When you combine a controlled environment with the right type of mic and good technique, you can capture audio that is 90% of the way to a polished final product. This prep work means that when you do need to clean up your audio in post, you’re just making minor tweaks instead of performing major audio surgery.
Picking the Right Tool for the Job
Stepping into the world of audio cleanup can feel like walking into a massive hardware store for the first time—the sheer number of options is overwhelming. You’ve got everything from one-click AI wizards to complex digital audio workstations. The secret isn't finding the single "best" tool, but finding the right tool for your specific needs right now.
Your choice really boils down to three things: your budget, how much time you've got, and your comfort level with technical software. A creator cranking out daily TikToks has totally different needs than someone producing a feature-length documentary. Let's break down the main categories to help you figure out where you fit.
The Rise of One-Click AI Tools
This is easily the fastest-growing and most accessible category, built for creators who need great results without a steep learning curve. These tools, often web-based, use powerful AI to analyze your audio, figure out what's human speech, and just strip away everything else.
Think of them as a "smart" filter. You upload your noisy audio, and a few moments later, you get back a clean version.
-
Top Examples: Adobe Podcast Enhance, Descript, Kapwing's AI Audio Enhancer.
-
Best For: Quick fixes, social media content, podcasting, and anyone who wants to remove background sound from video without getting lost in technical settings.
-
Pros: They are ridiculously easy to use, surprisingly effective on common annoyances like hum and hiss, and often free or part of an affordable subscription.
-
Cons: You get very little manual control. If the AI makes your voice sound a bit robotic or clips a sound it shouldn't have, there’s not much you can do to fix it.
These AI-driven solutions are exploding in popularity for a good reason. The market for this tech is projected to skyrocket from USD 2.31 billion in 2025 to an astonishing USD 45.02 billion by 2034. It's being baked into everything, with about 71% of consumer electronics manufacturers now including this tech in new smartphones and laptops. You can dive deeper into the market trends in this detailed industry report.
Built-In Tools in Your Video Editor
Before you go hunting for a new program, look at what you already have. Your video editing software—the one you already use to cut your clips—likely has some powerful audio tools built right in. Most professional Non-Linear Editors (NLEs) include some form of noise reduction, equalizers, and compressors.
This is often the most efficient route. You don't have to export your audio, clean it somewhere else, and then re-import it. You just apply an effect directly to the audio track on your timeline. For many YouTube creators, this is the sweet spot.
For many, the noise reduction tools inside DaVinci Resolve or Adobe Premiere Pro are more than capable of handling 90% of common audio issues. Learning these features is one of the highest-leverage skills a video creator can develop.
Take DaVinci Resolve’s Fairlight page—it’s a full-blown audio workstation hiding inside a video editor. Its "Voice Isolation" and "Dialogue Leveler" effects are absolute game-changers for talking-head videos. Adobe Premiere Pro has its own "DeNoise" and "DeReverb" effects that work wonders on everything from room echo to electrical hum.
Dedicated Digital Audio Workstations (DAWs)
For the truly awful audio problems, or for creators who demand absolute perfection, a dedicated Digital Audio Workstation (DAW) is the final boss. These are specialized programs built from the ground up for manipulating sound. They have a steeper learning curve, for sure, but they offer unmatched control.
With a DAW, you can perform audio surgery. You can visually identify and erase a specific sound—like a dog bark or a door slam—from the audio spectrum without messing up the dialogue around it. This is where you move beyond simple noise reduction and into true audio repair.
-
Top Examples: Audacity (Free), iZotope RX (Professional Standard), Adobe Audition.
-
Best For: Fixing complex or intermittent noises, achieving broadcast-quality audio, and those situations where automated tools just can't get the job done.
-
Pros: The highest degree of precision and control you can get. You can fix almost any audio problem if you have the patience to learn how.
-
Cons: Can be highly technical and time-consuming. It’s also very easy to over-process your audio and make it sound worse if you don’t know what you’re doing.
Making a choice can be tough, which is why we've put together a quick comparison to help you see the options at a glance.
Comparison of Noise Reduction Software Solutions
| Tool Category | Example Tools | Best For | Ease of Use | Typical Cost |
|---|---|---|---|---|
| One-Click AI | Adobe Podcast Enhance, Descript | Quick fixes, social media, creators prioritizing speed over control | Very Easy | Free to Low-Cost SaaS |
| Built-in NLE | DaVinci Resolve (Fairlight), Premiere Pro | Most YouTube creators, keeping workflows simple and integrated | Moderate | Included with NLE |
| Dedicated DAWs | iZotope RX, Adobe Audition, Audacity | Audio professionals, fixing complex noise, maximum precision | Difficult | Free to High-End |
Ultimately, the goal is to find a workflow that gets you great results without slowing you down.
For a streamlined, powerful editing experience that combines video and audio cleanup, a service-based approach might be ideal. Many modern platforms integrate these capabilities seamlessly. To see how an all-in-one solution works, you can explore the features included in Tubentum’s pricing plans. This can give you an idea of how automated editing workflows are making professional results more accessible than ever.
A Hands-On Guide to Removing Noise
Alright, enough with the theory. Let's get our hands dirty and actually clean up some audio. This is where we go from knowing what to do to really understanding how to do it. We're going to walk through the practical, click-by-click process to remove background sound from video using three of the most popular tools creators have at their disposal.
We’ll tackle real-world problems—like that annoying air conditioner hum you didn't notice until post-production, or the low-level whirring from your computer fan. You'll learn how to listen with a critical ear, pinpoint the problem, and apply the right fix without making your voice sound like a robot.
Think of your options like a branching path. You can go for a quick AI fix, use the tools built into your video editor, or dive deep with dedicated audio software.
Cleaning Audio in Adobe Premiere Pro
Adobe Premiere Pro is a beast for video editing, but don't sleep on its built-in audio tools. The fastest way to deal with background noise is the "DeNoise" effect. It’s perfect for those constant, droning sounds.
Imagine your recording is plagued by a distinct hum from your PC's cooling fan. You don't need a fancy third-party plugin; you can fix this right on your timeline.
-
First, bring up the Effects panel (if you don't see it, go to the "Window" menu to enable it).
-
In the search bar, just type "DeNoise" and it will pop right up.
-
Drag the DeNoise effect from the panel and drop it directly onto your audio clip in the timeline.
-
Next, select that audio clip and open the Effect Controls panel. You’ll see the DeNoise effect listed with a simple "Amount" slider.
The default is 40%, but you should never just leave it there. Play your audio back and slowly adjust the slider. The goal is to find that sweet spot where the fan noise vanishes, but your voice still sounds full and natural. If you push it too far, you’ll get that awful, garbled "underwater" sound.
My Pro Tip: It's almost always better to reduce the noise by 70-80% instead of trying to obliterate it. A tiny bit of natural room tone is far more pleasant to the ear than the weird digital artifacts that come from overly aggressive noise reduction.
Using Voice Isolation in DaVinci Resolve
The Fairlight page in DaVinci Resolve is a full-blown audio post-production suite, and its "Voice Isolation" tool feels like straight-up magic. It uses AI to figure out what is human speech and what isn't, which is incredibly effective for talking-head videos.
This tool shines when you're dealing with more than just a simple hum. Say a car alarm went off outside while you were recording. A standard denoiser would struggle with that, but Voice Isolation can often lift your voice right out of the mess.
Here’s how easy it is to use:
-
First, jump over to the Fairlight page (it's the little music note icon at the bottom of the screen).
-
Select your audio clip in the timeline.
-
In the top-right corner, open the Inspector panel.
-
Under the "Audio" tab, you'll see Voice Isolation. Just flick the switch to turn it on.
Honestly, the default setting often does the trick. A single dial controls the intensity. Just like with Premiere's DeNoise, you need to listen carefully as you adjust it. Find that balance where the distractions fade away without making your voice sound thin or processed.
If you're looking for more ways to speed up your editing, we have a ton of other creator guides over on the Tubentum resources page.
The Noise Print Method in Audacity
For creators working on a budget, Audacity is an amazing free tool with a surprisingly powerful two-step noise reduction process. The method is brilliant because you actually "teach" the software what the unwanted noise sounds like, making it incredibly precise for consistent background sounds.
This is the perfect fix for that electrical hiss or AC hum we keep talking about. The only catch? You need a few seconds of just the noise in your recording. This is exactly why I always recommend recording 5-10 seconds of "room tone" before you start speaking.
Here's the classic Audacity workflow:
Part 1: Capture the Noise Profile
First, open your audio file in Audacity. Find a small section—two or three seconds is plenty—that contains only the background noise you want to remove. Highlight it with your mouse. Then, head up to the Effect menu, go to Noise Removal and Repair, and choose Noise Reduction. A dialog box will appear; just click the Get Noise Profile button. That's it. Audacity now knows what to listen for.
Part 2: Apply the Reduction
Now, select the entire audio track you want to clean up (Ctrl+A or Cmd+A is the fastest way). Go back to the same menu: Effect > Noise Removal and Repair > Noise Reduction. This time, you'll focus on the three sliders. I've found that a good starting point is:
-
Noise reduction (dB): 12
-
Sensitivity: 6.00
-
Frequency smoothing (bands): 3
Use the Preview button to hear how it sounds. If your voice is getting a robotic tinge, try dialing back the "Noise reduction (dB)" slider. Once you're happy with the preview, click OK, and Audacity will apply the fix to your entire track. This manual process gives you a ton of control and delivers fantastic results, proving you don’t need to spend a dime to get clean, professional audio.
Tackling Tough Audio Problems
Sometimes, a simple denoiser just doesn’t get the job done. You’ve run the filter, but you can still hear that annoying electrical hum buzzing in the background. Or maybe a phone notification chimed right in the middle of your best take. This is when you have to put down the broadsword and pick up a scalpel.
Learning how to fix these tougher audio problems is what separates the pros from the amateurs. It’s about being able to salvage a recording that most people would have just thrown away. When you have the right tools—and know how to use them—you can perform some real audio surgery.
Surgical Noise Removal with an Equalizer
Think of an Equalizer (EQ) as a series of super-precise volume knobs, each controlling a very specific pitch in your audio. While a standard noise reducer makes a guess across a wide range of sounds, an EQ lets you make a surgical strike. This makes it the perfect weapon for constant, tonal noises, like the infamous 60 Hz hum from your home’s wiring or a high-pitched whine from a computer fan.
The whole idea is to find the exact frequency of that annoying sound and just turn it down without touching anything else.
-
Hunt it down: Most EQs have a "solo" function for each frequency band. Just make the band really narrow and sweep it across the sound spectrum. When the hum suddenly gets much louder, you've found your target.
-
Make the cut: Once you’ve pinpointed the frequency, you create a very deep, very narrow cut. This is like turning the volume knob for just that one specific tone all the way down.
-
Check your work: The goal is to kill the hum without making your voice sound thin or weird. A deep but tight cut is usually all you need to make the problem vanish, leaving your voice perfectly intact.
This technique is incredibly effective because it doesn't mess with the rest of your vocal frequencies. You get to keep the natural, rich quality of your voice.
Erasing Unwanted Sounds with Spectral Repair
So, what about those sudden, one-off sounds? A dog barking, a chair creaking, a cough in the next room—a normal denoiser can't fix these because they aren't consistent. For these audio headaches, you need a visual tool called Spectral Repair.
Picture your audio not as a waveform, but as an image. Time runs left to right, pitch runs bottom to top, and the brightest spots are the loudest sounds. On this "spectrogram," a sudden dog bark shows up as a bright, distinct blob.
Spectral repair is basically Photoshop's content-aware fill, but for audio. You visually select the unwanted sound—that bright blob on the screen—and the software intelligently rebuilds the audio behind it using what's around it.
This is the ultimate get-out-of-jail-free card for creators. Tools like iZotope RX or the spectral editor in Adobe Audition give you this power. You can literally paint over a phone notification that went off between words, and no one will ever know it was there. It takes a bit more time and effort, but mastering this means almost no take is truly unsalvageable.
This growing need for crystal-clear audio is a huge deal. The market for the noise suppression components that power these tools was valued at USD 28.33 billion in 2025 and is expected to rocket to USD 86.33 billion by 2034. You can dig into the numbers in this comprehensive market analysis. This explosive growth just goes to show how essential it is to know how to remove background sound from video with this level of precision.
Common Audio Cleanup Questions Answered
Even with the best tools, you’ll probably hit a few snags when you first start to remove background sound from video. Don't worry—most creators run into the same issues. Let’s walk through some of the most common questions so you can get your workflow dialed in and get back to creating.
One of the biggest hurdles is just knowing where to start. With so many plugins and settings, it's easy to get lost in the technical jargon. The key is to stay focused on solving the specific problem right in front of you without making things more complicated than they need to be.
Can I Really Do This for Free?
Absolutely. You definitely don’t need to drop hundreds of dollars on fancy software to get professional-sounding audio. Free tools like Audacity and the standard version of DaVinci Resolve pack some incredibly powerful noise reduction features that are more than enough for most YouTubers.
For instance, Audacity's two-step 'Noise Reduction' effect works wonders on constant sounds like fan hum or an electrical hiss. Over in DaVinci Resolve, the Fairlight page has a built-in 'Noise Reduction' plugin that can produce broadcast-quality results. While paid tools might have more sophisticated AI, you can fix the vast majority of common audio problems without spending a dime.
Why Does My Voice Sound Robotic or Watery?
Ah, yes. This is the classic side effect of audio cleanup, something we call "artifacting." It’s what happens when you get a little too aggressive with your noise reduction settings and the effect starts eating into frequencies that are actually part of your voice. The software, in its quest to kill the noise, accidentally attacks your dialogue.
The fix is always to dial it back. Just reduce the 'amount' or 'sensitivity' of the effect. Your goal is to make the background noise less distracting, not to obliterate it entirely. A little bit of natural room tone is always better than a distorted, watery voice.
A great pro tip is to use the "listen to noise only" feature if your tool has one. This lets you hear exactly what’s being cut out, making it obvious if you’re accidentally stripping away parts of your dialogue. For more tips on improving your editing workflow, check out the creator resources on the Tubentum blog.
Should I Clean Audio Before or After Video Editing?
For the smoothest workflow, you should always clean your audio files before you start chopping up your video clips. I know it seems like an extra step upfront, but trust me, it saves a massive amount of time and delivers a much cleaner result in the end.
Here’s the process I recommend:
-
Apply noise reduction to your entire, uncut source audio clips first.
-
Export these cleaned-up clips as new high-quality WAV files.
-
Bring those new, clean files back into your project and sync them with your video.
Doing it this way ensures the noise profile is consistent across the whole recording, which makes the removal process far more effective. It also saves you from the soul-crushing task of applying the same effect and settings to dozens or even hundreds of tiny edited clips on your timeline later.
Ready to skip the tedious parts of editing altogether? Tubentum automatically removes silences, filler words, and repeated speech from your talking head videos, letting you focus on creating great content, not just cleaning it. Get your time back and produce polished videos in a single click at https://tubentum.com.